
Little Brown Paper Bag Stuff Stash Booklet Tutorial, such a big name for such a little thing. LOL
Today I was bored and decided to make a couple tiny brown paper bag folders to stuff with some stash or whatever. I gave them to the first two gals who posted on my feed at AMG. The lucky winners was Elisabeth and Meegan. The Melody said I should make tutorial for it, so here I am!!!!


All you need are four SMALL brown paper bags. Lunch bag size or smaller, I happen to recycle my neighbor who gets one can of beer after work each day. LOL

I made the bottom flap go to the left

then cut the whole bottom off

when you have all four cut, just stack them

and fold them along the middle

Now time to stitch them up with a thick tread and a big eye needle.

start at top and work stitching all the way down.


When I am at the end of stitching I add some beads to the thread and tie a knot at bottom.


I left a little extra thread for a tassel.

Cut some extra ribbons to tie on.

Simply loop them in the stitching and tie a couple times very tight.


I used a couple sticks of gelatos or anything you want, it is your booklet :)


blending them in a bit

I stamped the booklet with my new skully stamp Wendy got me, I love anything with skulls or wings.

That was it, very simple and easy!
Now you can decorate the inside and use the side pockets to stuff with some goodies of your choosing.

Here is another project I finished today using some of the business cards I had gotten Sunday at the market (see last post) and a box I got for the post office. (flat rate boxes) I have much pride and love for my city Detroit and always incorporating it some how in some of my art journaling pages.

There are tons of layers in this. I used acrylic paints, gelatos, inks, washi tapes, foam stencil for a little 3D effect, paint pens and joy ink pens.

I love how it came out.

Going to hang it in my craft room.
And for my last project to show you, I had made yesterday while my PC went to the shop to get a tune up.
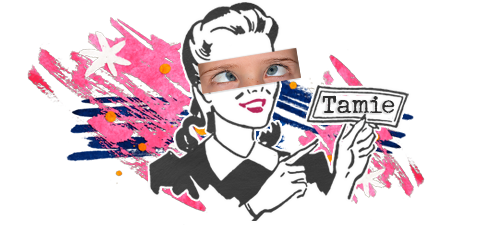
I used lots of gelatos for the background, found a cut cut out from a magazine, colored in her hair and lips with paint pens, extras used was some washi tape, word and flower bits with some brads. Also used gelatos around the tiny flowers and scribbled with the joy ink pens. Ohhhh those pretty eyes I got in happy mail from our lovely Betty. The top and bottom boarder was a piece of newspaper I used under some projects so it had lots of goodness on it, I trimmed it up with black embossing powder and used my new heat gun and burn that baby to the crisp, made an awesome effect and waaalaaa she was done. I flippin' love her :)

Well that is it for today and many thanks for stopping by we hope to see you soon.


Love it!!!! Thanks so much for sharing!
ReplyDeleteTamie, great stuff, girlfriend. You are so creative and I absolutely love the use of those big ole googly eyes! I wish I had bought all of them. Maybe I will find some more one day at the flea market! Keep up the great work!
ReplyDeleteThank you for sharing your tutorial!! :)
ReplyDelete